The 10 best cloud security certifications for IT pros in 2024
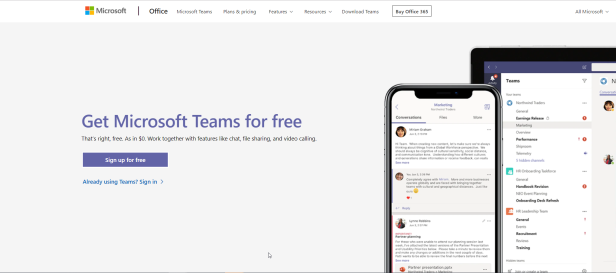
This post will show how to get set up with the free version of Teams. This is for the users who don’t have Office 365 subscription. The free version is available for organizations up to 300 users and supports chats, audio calling, guest user access, the Office Online apps, and includes 10 GB of storage for files within channels (SharePoint Online) and 2 GB per user (OneDrive for Business) for personal storage. The main reason why Microsoft introduced a free version of Microsoft Team was to pull as many people away from competitive services like Slack as possible. Usually, when a company offers a free version of their software to consumers, the aim is to hook people with a taste of the product, then gradually convince them to unlock the full potential of the platform. In the free version of Microsoft Teams, the first person who signs up in your organization has a limited admin role. The person who has this limited role can add and remove team members and specify whether anyone can invite additional members, but this user has no advanced administrative capabilities and no access to the Microsoft Teams admin center. In order to start with free version browse to the https://products.office.com/en-us/Microsoft-teams/free
This is where you can setup Teams for free, but it also gives you a summary of features that you miss out on with the free version.

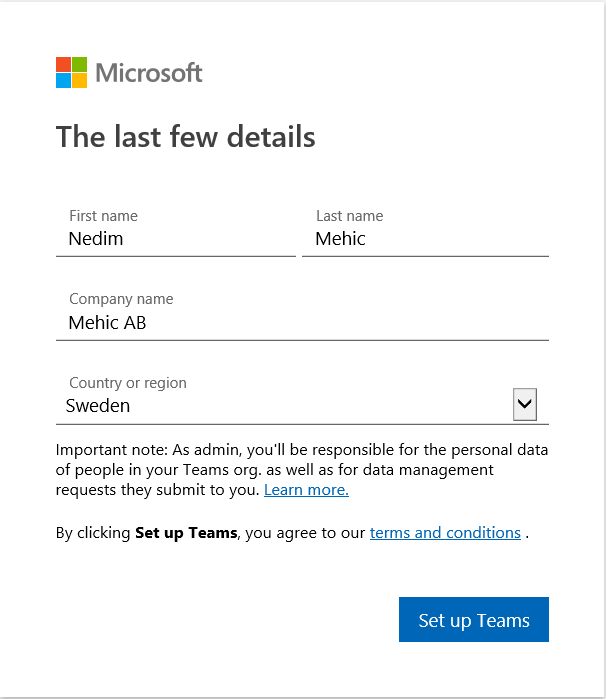
If you’re okay with those limitations, you can start the registration by clicking on Sign up for free. Once done you will be prompted to insert email address you want to use. If your email address is not already associated with a Microsoft account, it will prompt to create a new account with Microsoft that will be tied to that email address. On the last page you will need to fill in some information about you and your organization for Teams and once you fill in that information, Set Up Teams
It may take a few seconds to get Teams set up and configured for you. Then it will take you to the Team’s interface. Now if you already have the Team’s desktop application installed, it may prompt you to launch that. I’m gonna stick with the web app. Something that is unique to the free version of Teams is this link down at the bottom (Invite People).
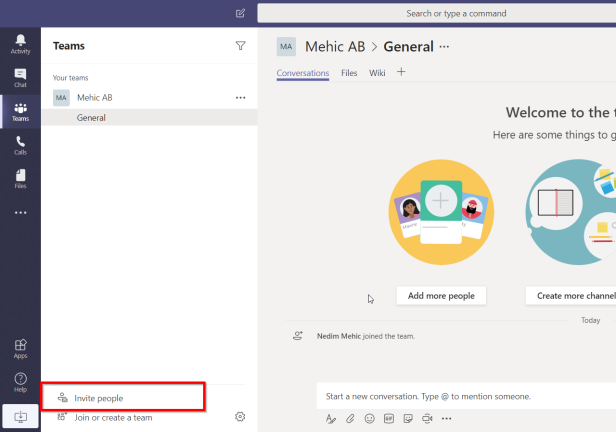
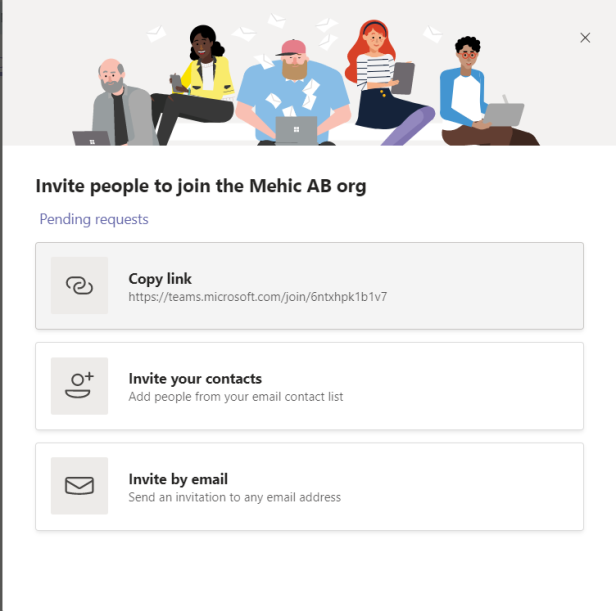
Here you can add co-workers to your Teams. Here in the free version, there is nobody in your organization unless you invite them so when you click on that link you will have 3 options.
- Copy Link – When you click on it, the link will be copied to clipboard. You can send the link to the people to invite them. When they click on the link they will have to type in the name and the email address and submit the request to join your team.
- Invite your contacts – Select this if you would like to invite contacts from your list of email contacts.
- Invite by email – here you can type in the email address for the people that you want to work with in Teams. The people you invite will get an email with a link to join your team.
If we go to the main menu (by clicking this icon in the top right corner) and clicking Manage Org
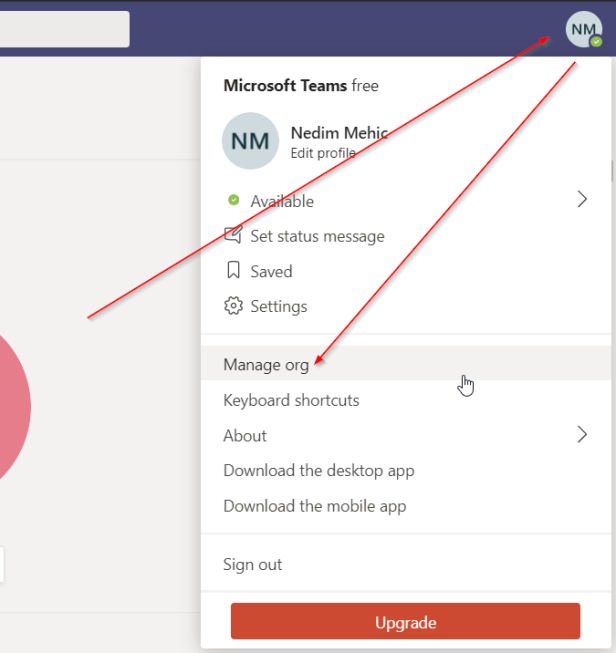
We will notice that there are almost no options that we can use. We can see the members and what role they have. Clicking on the Settings tab will give us 2 options. We can configure who can invite new members and we can hide organization join link. When you click on the Invite People link, the organization link is the first option we can use (Copy Link). Disabling this will remove copy link from the options.

Upgrade to Full version
We can easily upgrade to the full version by purchasing an Office 365 subscription plan for our users. Before upgrading to paid version there are a few things that we should keep in mind
- Once you upgrade Teams to paid version you will not be able to switch back to free. It is a ticket in one direction
- Merging multiple free team tenants into one paid tenant is not supported.
- All users must be in the same domain. During the upgrade, you’ll register a domain name for the organization.
- After the upgrade, all sign-in addresses in the org must match the new domain name. You’ll need to update any email addresses that don’t match the domain name in order for those users to use the full versions of Teams and Office 365.
- Mix of Teams free and paid subscription users in the same tenant is not supported. All users must be upgraded.
Retain Data
To upgrade and transfer your data, you have to buy your subscription through the upgrade process in the Teams application. If you purchased Office 365 with Teams without going through the upgrade process, you can’t transfer your data because you will already have a separate tenant.
Once done, you can upgrade your free version to paid by going to settings and clicking on upgrade.

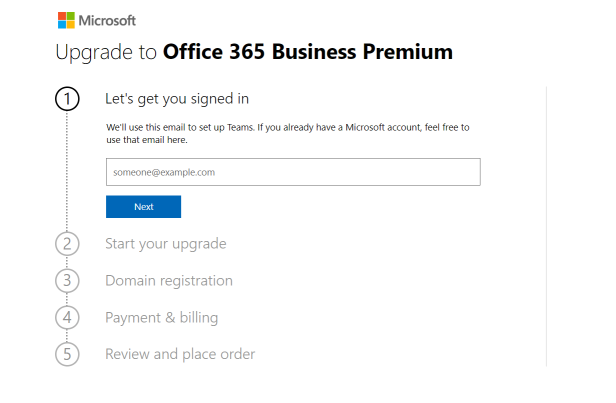
When you click on Upgrade you will be redirected to the page to choose the plan. For ex Business Premium. If you would like to upgrade to E3 you will first need to upgrade to Business Premium and then switch the plan to E3.

When you choose the plan and click on Upgrade Now, you will be redirected to the page where you need to specify new domain, login name etc.
After upgrading the organization, update each member’s credentials to Office 365 credentials so they can use the full version of Teams and all Office 365 services.
In the next post we will dig deeper and explore configuration, team creation etc.
That’s it. I hope you enjoyed and learned something new.
Stay Tuned!
Cheers,
Nedim