Microsoft Teams is really popular product but can be overwhelming when it comes to migrating them from one tenant to another. In this post we will see how to migrate Microsoft Teams from tenant to tenant using BitTitan. BitTitan MigrationWiz allows you to migrate mailboxes, documents, public folders, and other workloads across a wide variety of migration endpoints.
Before we continue there are some things to keep in mind.
BITTITAN ACCOUNT
If you don’t have an account you can easily create one by visiting this link Register BitTitan account
LICENSING
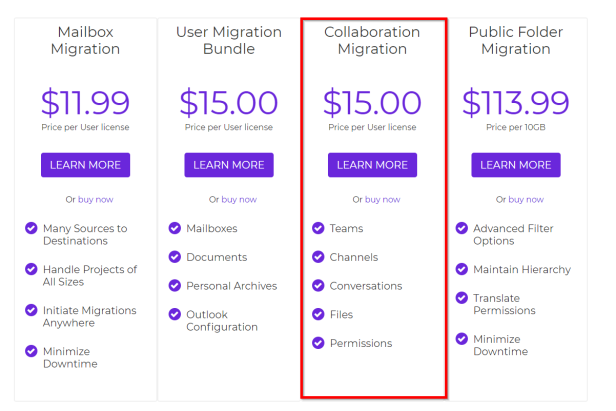
On BitTitan Pricing page you will find 4 different licenses that you can use. Collaboration Migration is the license that you need. It is a per-user model so for example if you need to migrate 1 team with 10 users you will need 10 collaboration licenses.
REQUIREMENTS
- Each license allows up to 10GB of data to be migrated per license per user. If more than 10GB is being migrated, purchase enough licenses to cover the total amount of data being migrated.
- At least one license is required for each user discovered on the Source during the Assessment.
- Collaboration Migration requires a Global Administrator account to be used on both the Source and the Destination endpoints. This account must also have an Office 365 license applied that includes Teams.
- Turn off MFA (if used) for the administrator accounts on both the Source and Destination before starting a Collaboration migration.
- MigrationWiz is not an updating tool. Once a Collaboration project has been started, it is recommend that you do not rename any Channels at the Source. If Channels need to be renamed, they should be renamed before an initial Assessment is run, or after all teams have been successfully migrated to the Destination tenant. If a Channel is renamed between when the initial Assessment is run and the final migration has completed, some files may end up in incorrect Destination locations.
- Conversations that are migrated, then updated on the Source, will not be updated on the Destination when the migration is run again. Because of this, it is best to plan to do this migration in a single migration pass, generally over a weekend or a planned downtime.
Once we know that we are ready to start with the migration
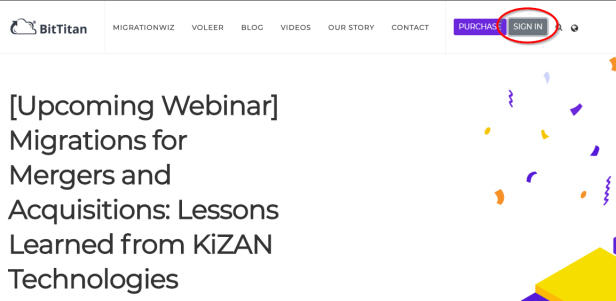
First thing is to browse to BitTitan HomePage and sign it.
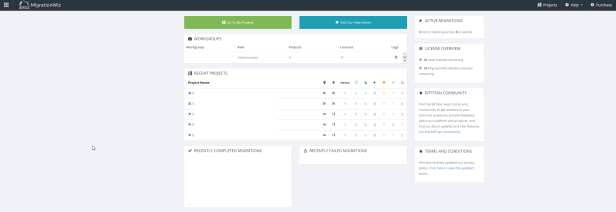
Landing page after login looks like this. It will give you overview of all recent projects with info about completed and failed migrations. There is also a license section which will give you info about the license status.
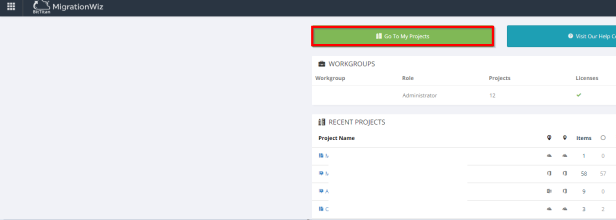
Our next step is to add a customer and create a project. You can accomplish this either by clicking on the app launcher and selecting MSPComplete

or by clicking on Go to My Projects button. I like the second option so I will click on the green button.
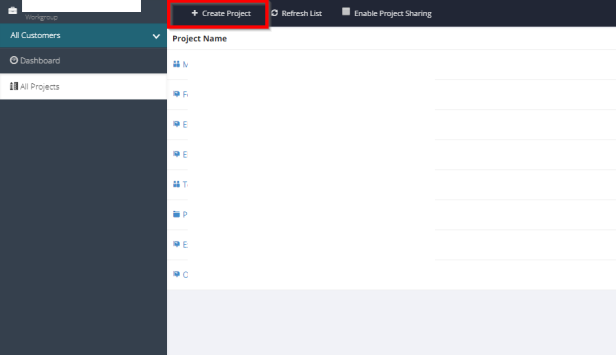
Click on Create Project
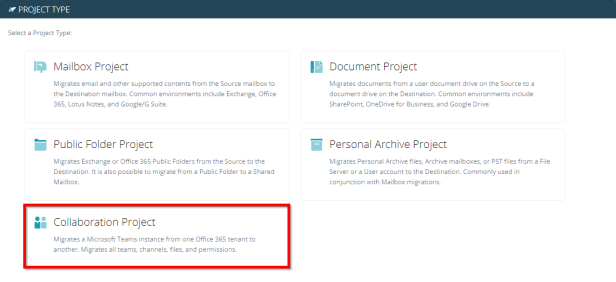
MigrationWiz facilitates several types of migrations from source to destination. Click on Collaboration Project
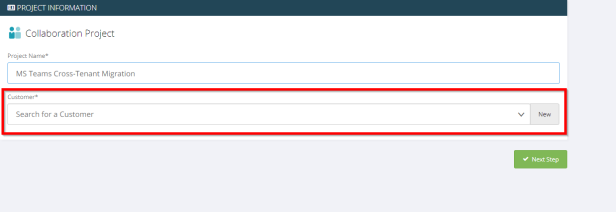
Enter a Project name and select a Customer. If you have not already added the customer, you will need to click New to create the Customer (Only 2 fields are required primary email domain name and the customer name). Once done click Next Step
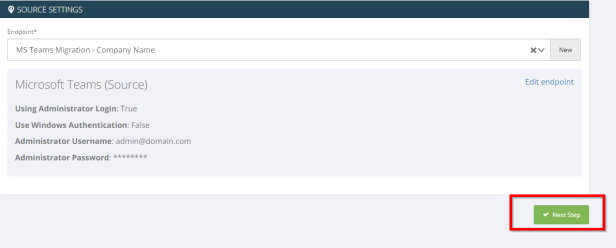
Our next step is to add the endpoint. If you have not already added the endpoint to the customer, you will need to click New to create the source endpoint. (An Endpoint is a set of customer-specific connection information and credentials that allow Bittitan to establish a connection to a server or service such as Exchange Server, Office 365, G Suite, or other cloud services. When you create a new endpoint, you have the option to set unique administrator credentials that make the delivery and 24/7 monitoring of services and other customer-related activities more efficient and secure).
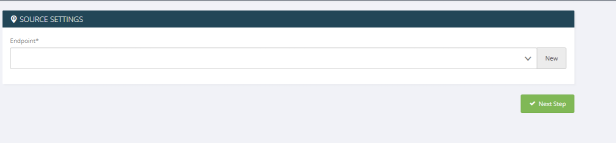
When you click on New, you will need to give it a name and provide global admin credentials of the source tenant. Because we migrate teams the endpoint type will be pre-populated.
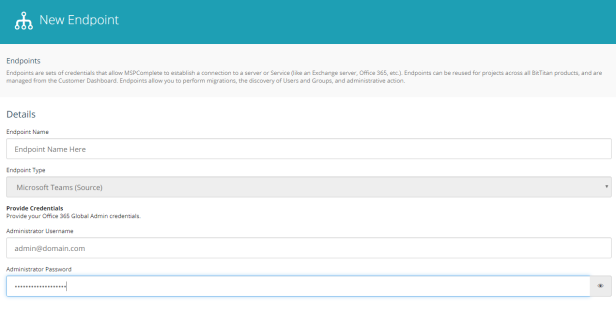
Once done click on Next Step
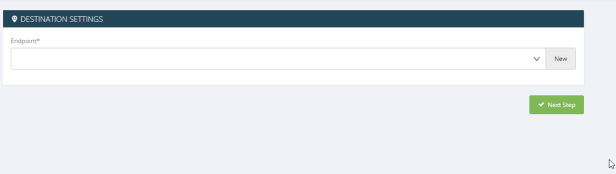
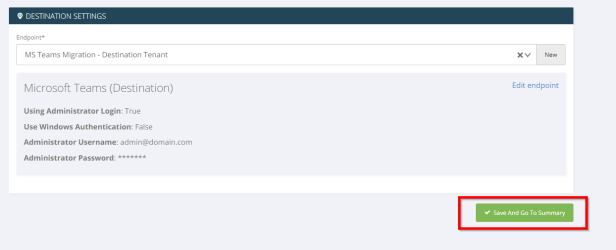
Now we need to do the same for the destination tenant. If you have not already added the endpoint to the customer, you will need to click New to create the source endpoint.
Give it a name and provide global admin credentials. At the bottom we have 2 options. You can either use Microsoft provided Azure storage or your own Azure Storage. If using your own, the Storage Account Name and Access Key will be required.
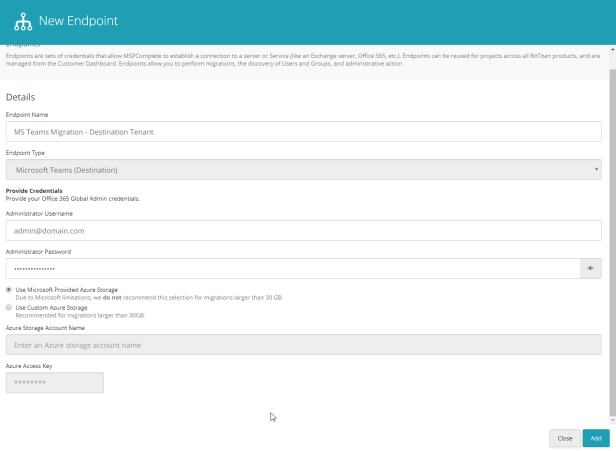
Once done click on Save and Go to Summary
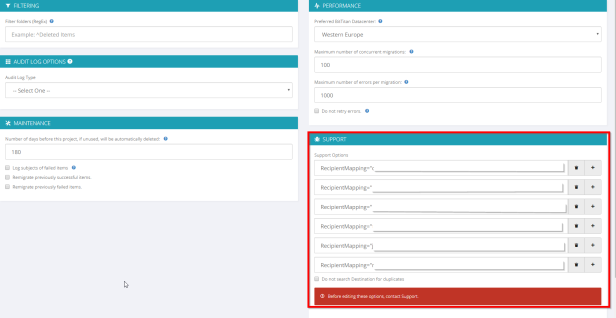
Click on Advanced Options

If the email address is different in the source and destination environment you will need to use user mapping to match right user in source and destination. Under the support section type RecipientMapping=”source upn->destination upn” for each user that needs to be migrated.
Example:
RecipientMapping=”nedim@mehic.se->nedim@mehic.com”
Once done click on Save
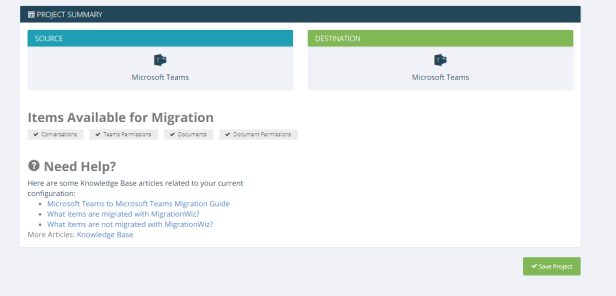
Save Project
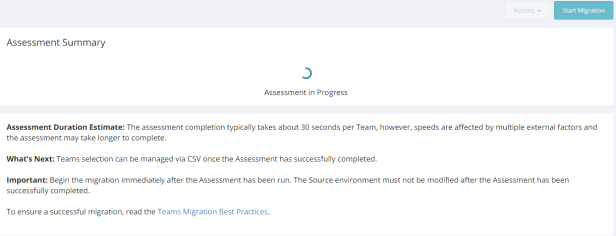
Our next step is to run Assessment. Click Start Assessment
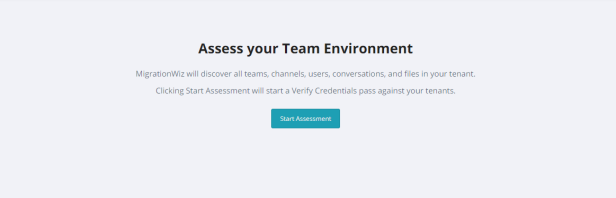
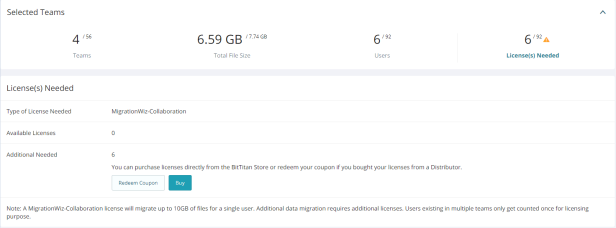
This step will connect to the endpoints and discover all teams, channels, users, conversations, and files before the migration can proceed. When the Assessment completes, MigrationWiz will display information such as the number of teams, total file size, total number of users, the number and type of licenses needed, and the number of licenses currently available to be used. The migration administrator account will add and remove itself from each Team as part of the assessment process. Guest users will not be included as part of the assessed license requirement. Conversations that guest users participate in will be migrated as part of the migration process. This may take a very long time to complete so be patient.
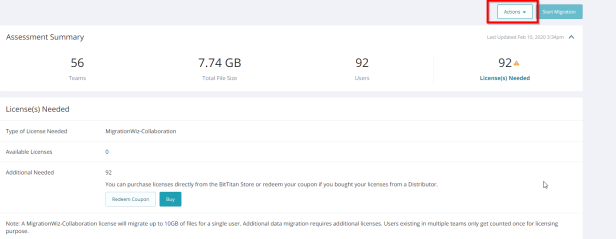
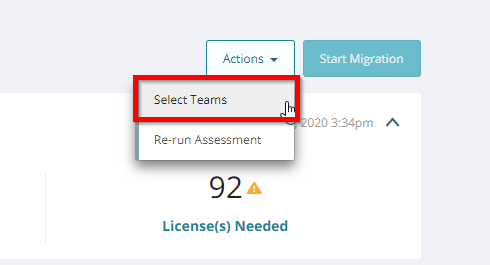
Once done, you will get info about total number of teams, total files size, users and how many licenses you need to have for the migration. If you want to migrate everything just purchase enough licenses and start the migration. If that is not the case and you want to migrate only few teams, click on the Actions button
and from the drop-down menu choose Select Teams
By downloading Assessment Summary CSV File, you will be able to select exactly which teams to migrate. When the file finishes downloading, open the file and edit only the first column, titled Selection (true/false). All teams with “TRUE” in the Selection column will be included in the migration. To exclude a team from the migration, change “TRUE” to “FALSE”. A blank cell will be treated as a “FALSE”. Do not change any other information in the CSV file. Changing other fields will cause the team selection to fail.
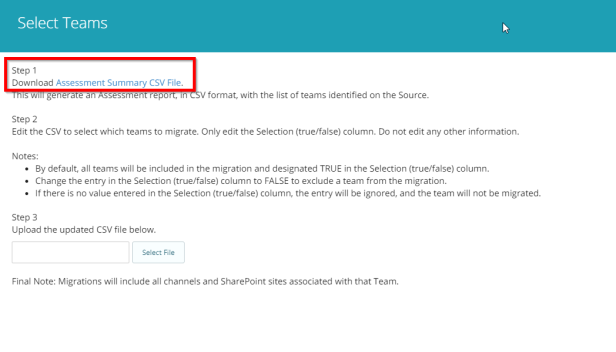
Once done, upload the CSV file and click Import.
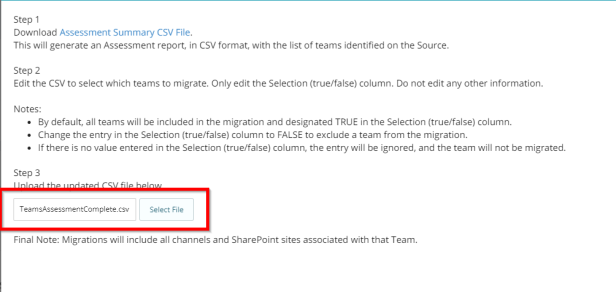
The Assessment results for the project will be updated to reflect only the teams now selected for migration. (If any additional changes are needed, you can re-download the updated file and make further changes. When you click on Actions – Select Teams – new link will be available containing newly uploaded file named Select Teams CSV File)
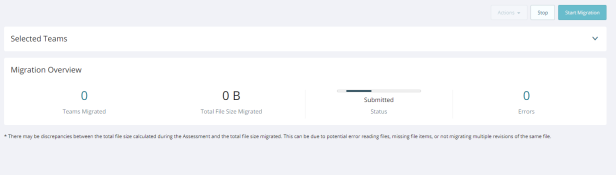
Last step is to purchase enough licenses and start the migration by clicking on Start Migration. On the migration overview page you will get info about the migration status.
After the migration completes, verify on the Destination tenant that only the specified teams have been migrated.
Notes
- The teams and channels will show the Administrator account as having added the users and then leaving the group.
- All conversations will be migrated with a UTC timestamp.
- Only the latest 3,000 messages in a channel will be displayed in the Destination channel. The entire conversation history for the channel be found in the Conversation History tab on the Destination team channel. The messages in the Conversation History tab are not able to be replied to.
- This migration process syncs the permissions of users from the Source to the Destination. If permissions differ on the Destination, the Source will always be used as the reference.
That’s it. Next 2 posts will cover OneDrive for business cross tenant migration and email migration.
Stay Tuned!
Cheers,
Nedim