The 10 best cloud security certifications for IT pros in 2024
We will continue our journey by exploring the supported file formats that we can use. Microsoft Stream supports many, many video formats. You can upload for example MPEG-2 files, MP4 files, QuickTime movies, Windows Media Video etc. To see the full list please visit Microsoft Stream formats. If you want to upload a video in a format that is not currently supported, you have some options. There are online services that will allow you to take a video in one format and save it in another format and there are also desktop tools that you can download for this purpose.
Add Description to Video
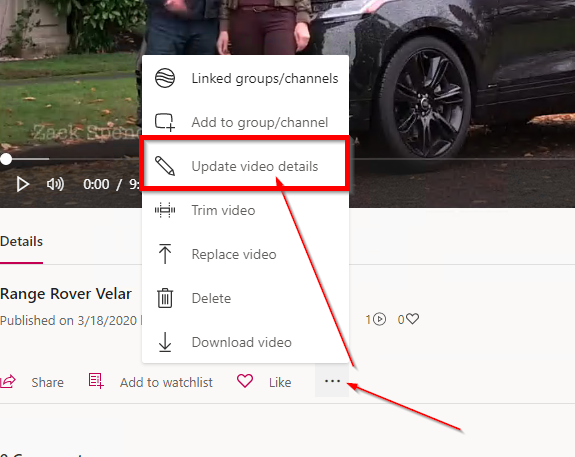
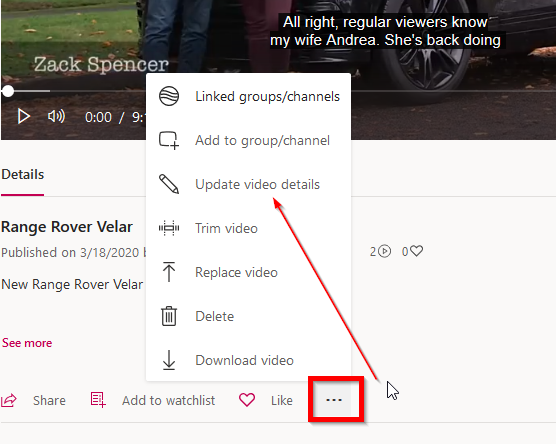
If you remember from the previous post, I forgot to add the description to my video. To to that I need to click on the 3 dots (…) and select Update video details
In the description, you can type in text, hashtags, post a link and add a time code which allows you to put in a link to a specific point in the video for your users and the format for this time code is H:MM:SS. This is independent of the transcript and closed-captioning. Once done, click on Apply
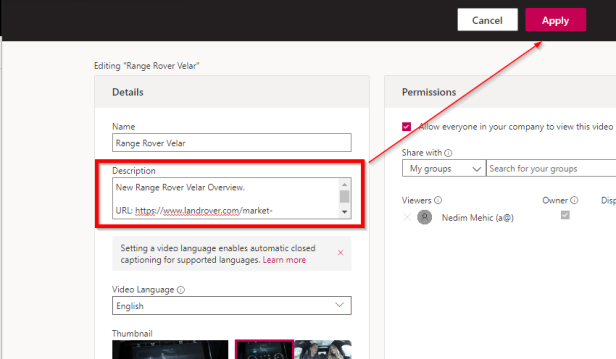
After update, it looks like this.

EDIT TRANSCRIPT
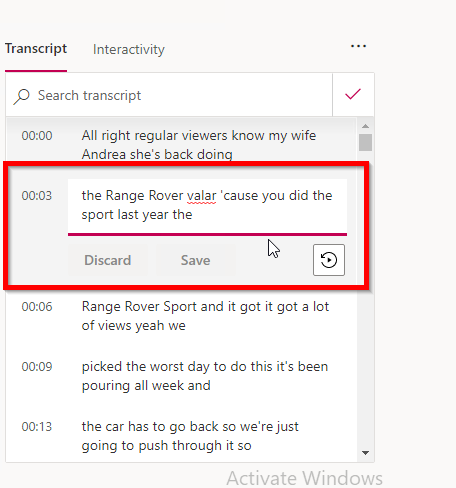
When I uploaded the video I got the auto-generated transcript and the captioning service does a pretty good job of figuring out what’s being said, but there could be some specific words that it misses, or sometimes the audio portion isn’t loud enough or clear enough because of recording. This was recorded outside, so it’s quite possible there are some portions of the captioning that are not quite correct. If I want to work on editing, I can click and listen to any section. If I want to edit any part of it, I click edit.

And then I need to select the section that I would like to edit. Once done, click on Save
Now if this was a very long video with a lot of text, what you could do is to download the transcript, edit it and then upload it back. To to that you need to click on the 3 dots (…) to go back to Update video details and then click on Download File. It will download the file in .vtt format so you would need to use for example notepad to open it. When you are done with the editing you will need to save that file in a UTF8 format.
POWER OF SEARCH
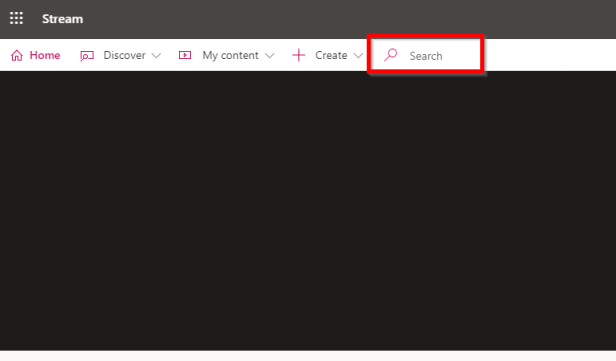
Searching in Stream is very straightforward. If I want to search throughout Stream for all of the content I have access to regardless of where it is located, I search using the search box at the top of the page.
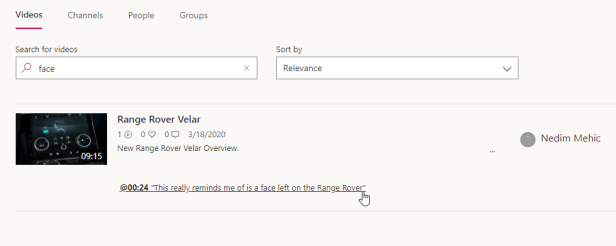
If I’m here and I search, for example, for the word face, it will return a video or videos that have that word. Here is one video that has the word face. Now if I click for example on the link, the video will be opened specifically to that location where the word face is found in the video. And after it loads, it will begin playing at that point. Really nice. This is yet another reason why correct captioning and a correct transcript is so important.
If you only want to search your videos, videos you have uploaded, you are not going to use the search at the top. You will need to click on My Content – Videos and use that search.
WORKING WITH GROUPS
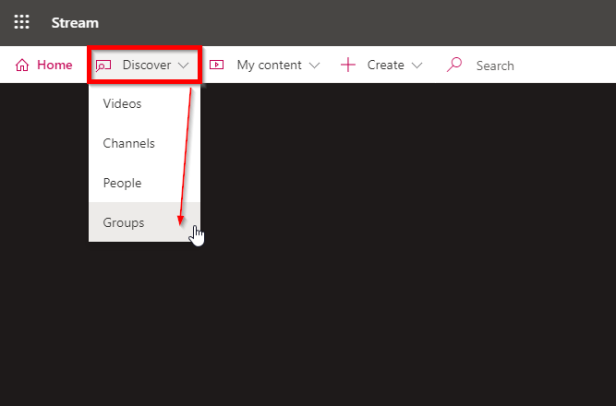
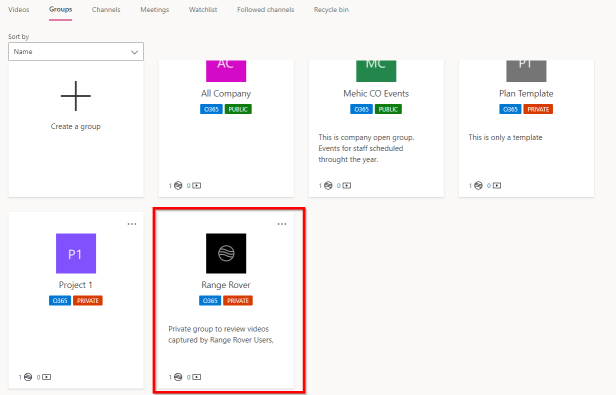
When I want to grant permissions to a group of people in Microsoft Stream, I do it the same way I do in e.g. SharePoint. I create a group and it’s an Office 365 group. You can find groups by going to Discover section and clicking on Groups
One thing to keep in mind is, if you delete a group here in Stream, you are actually deleting everything associated with that Office 365 group, which means that you will delete all conversations, all files, and all of the content from all of the Office 365 group services. So not only are these the same groups that we see throughout Office 365, deleting them here has the same implications as deleting them in admin center so be careful.

To create a new group, click on Create and select Group (or click on My Content –> Groups and then click create)

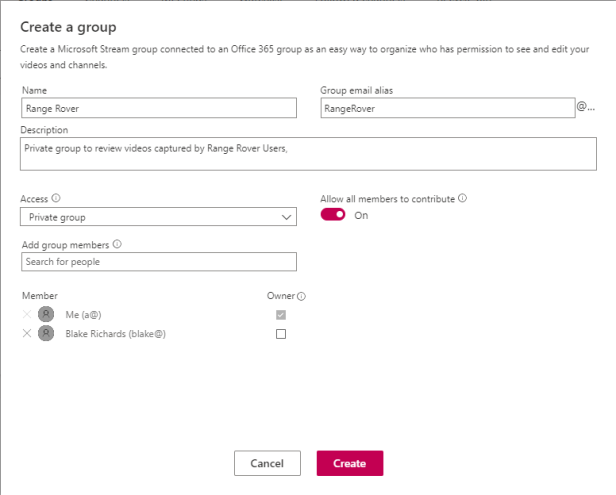
Give you group a name, edit the group email if it is too long or if needed and give it a description. In the access section we have two choices about this group, is it a private group or is it a public group? I will make it Private.
Allow all members to contribute –> If I want all to be able to contribute items to this group, then I will leave this on. If, on the other hand, I’m creating a group and I want to simply be able to have most of the people view the content but not contribute, I would turn this off.
Last step is to add group members and decide if anyone of those users will be owner. Once done, click Create.
CREATE CHANNELS
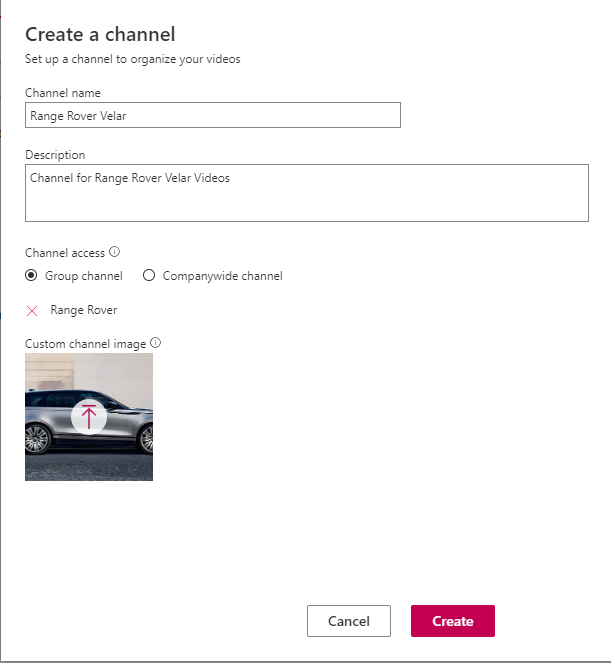
In Microsoft Stream, we use channels primarily for organizing videos in a way that makes sense to our users, all of our colleagues. Remember that channels don’t have a permission method, that’s not what they’re for. If I’m about permissions, I should choose a group. To create a new channel, click on Create –> Channel (or My Content –> Channel –> Create a new channel)
Give it a name and the description.
Channel Access -> There are two basic types of channels that I can create. I can create company-wide channels and group channels. I will create group channel and link it to Range Rover group that I created earlier.
Last step is to upload the image. This image will appear whenever people are looking for channels, so make sure it’s something that fits. Once done, click Create
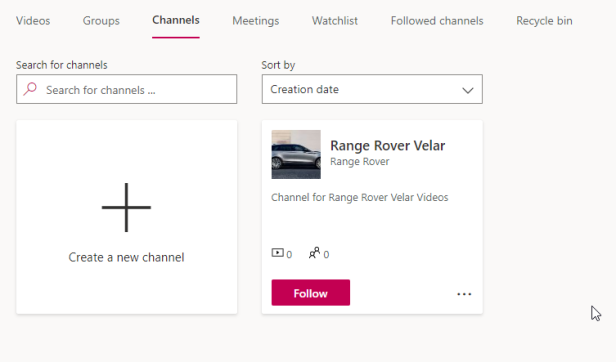
One of the purposes of channels is to allow people to self-curate their experience in Microsoft Stream. If someone want to be able to follow this channel. there is a Follow button and then information that is posted in this channel is going to make its way to users homepage on the portal.
Other choices about what I can do with this channel are: I can edit it, delete it, I can share it with someone. If I delete this channel, it does not do anything to any videos that I’ve placed in this channel. It only deletes the channel itself. And because it’s a channel, not a group, it has no impact on Office 365 groups. When I add content to a channel, I can add the same content to multiple channels. So it might be that I have a particular video that belongs in Range Rover Velar, but we also have a channel for Range Rover Elite Cars that someone has created and I could also add it to that channel as well.
Add a video to a channel or group
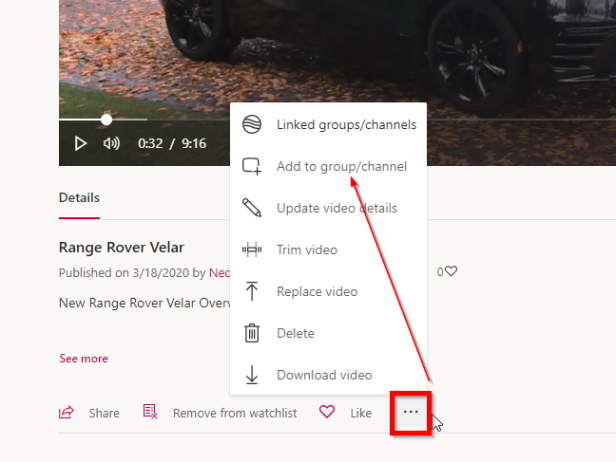
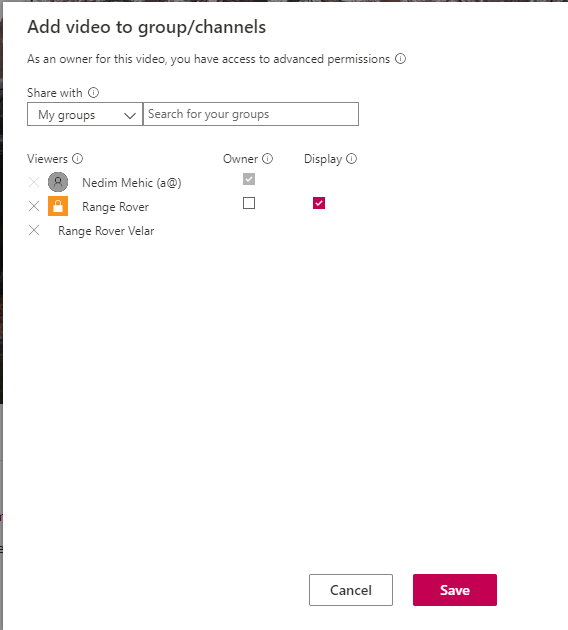
When you upload a video you have a choice to make it a company-wide video or to add it to a specific group. If a video is a company-wide video it makes it easier for that video to go viral because anybody can add that company-wide video to any of their groups or channels so they can promote the video. If a video is not a company-wide then you can add that video to any group or channel that you are allowed to contribute to. Process is straightforward. Go to the video that you would like to add to a group or a channel and click on the (…) and select add to group or channel
Under Share with, you can share the video in groups or channels or you can share it with people. I will add a channel and a group that I created earlier. Notice that my first column is who can view this. The next column is who’s the owner, so far me and then finally, the display and that display checkbox is turned on for the group and the reason it turns on for a group and not a channel is that a group has a page in Microsoft Stream. Once done, click Save.
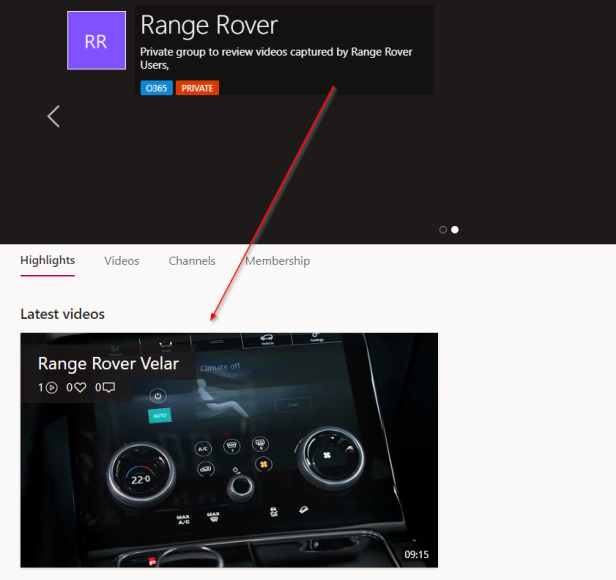
If I go to My Groups –> Range Rover, I will land on the group page and that group page has a video pinned to it because I just added it and chose to have it displayed.
ADD SUBTITLE TO A VIDEO
Captions are a transcript of the words that are spoken in a video in the language in which they were spoken. If I want to provide a translation for other folks, I will do that through subtitles.
OBS! If you are not a native and proficient speaker of the language that you’re creating subtitles for, you’re not the person to sign off that the subtitles are right.
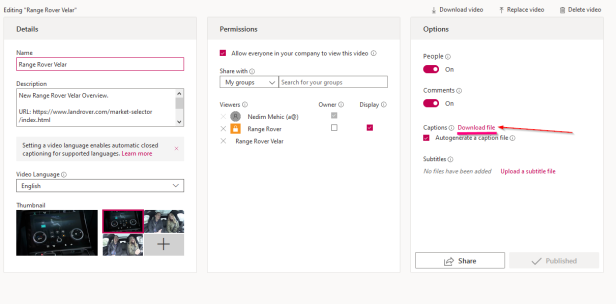
Let’s see now how we can add a new subtitle to our video. We will begin by downloading the caption file. Go to your video and click on (…) and Update Video Details
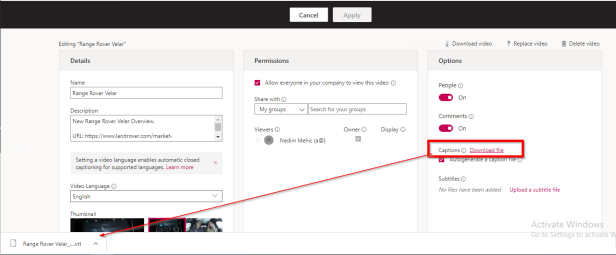
Click on Download File (Under Captions). File will be saved as a text document with a particular type of extension, which is a .vtt. You will need to open that file in a notepad.
For this demonstration I will use google translate and translate some of the text to French. I will replace first 2 parts.
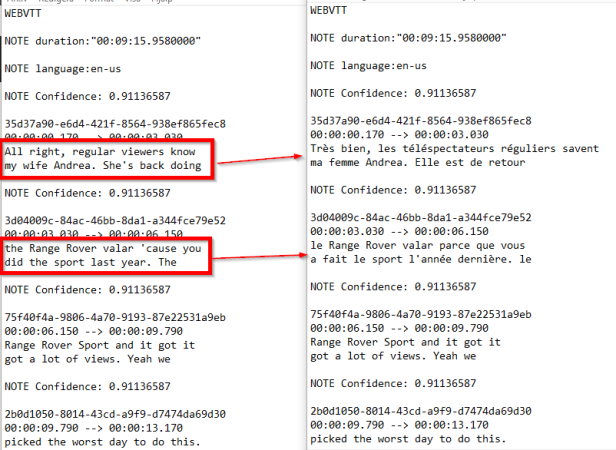
Once done, save the file in the UTF-8 Format. Because French language has special characters like (é,è) Unicode has all the characters possible in it, so by switching to UTF-8, I’m telling Notepad that I want to save this document in a way that will preserve those special characters. Keep in mind to save the file in .vtt as well.
Next step is to upload the file to Stream.
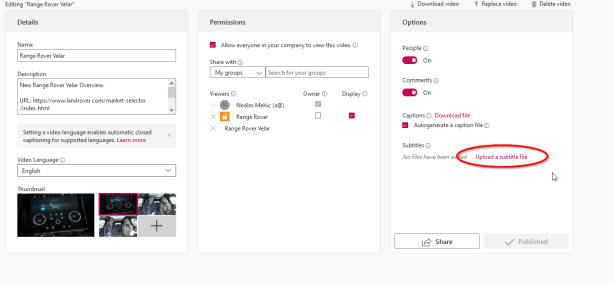
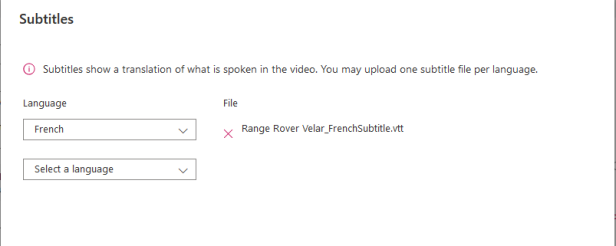
Choose the language and upload the file. Once done, click OK
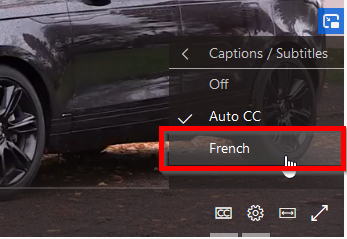
Go back to your video and select Settings –> Captions / Subtitles
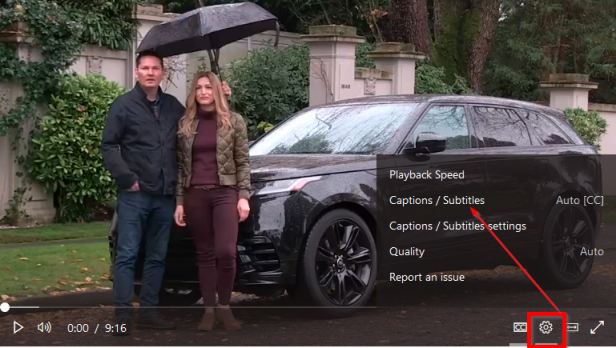
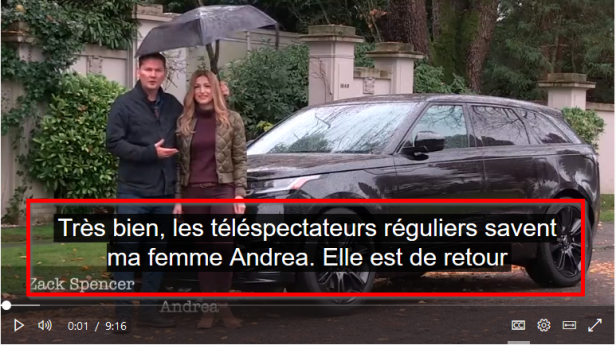
Select the language from the list and play the video.
and now we have French translation.
TRIM VIDEOS IN MICROSOFT STREAM
Many times when we record a meeting or a live event there are places in videos where time is consumed on preparations or something else that we would like to delete. If that is the case, Stream has a feature that can solve this issue.
Things to keep in mind:
- Any manual changes to transcripts will be lost if the video is trimmed. To avoid this, trim video first before making changes to transcript.
- Timecodes and forms in a Stream video are not automatically updated based on the trimmed time.
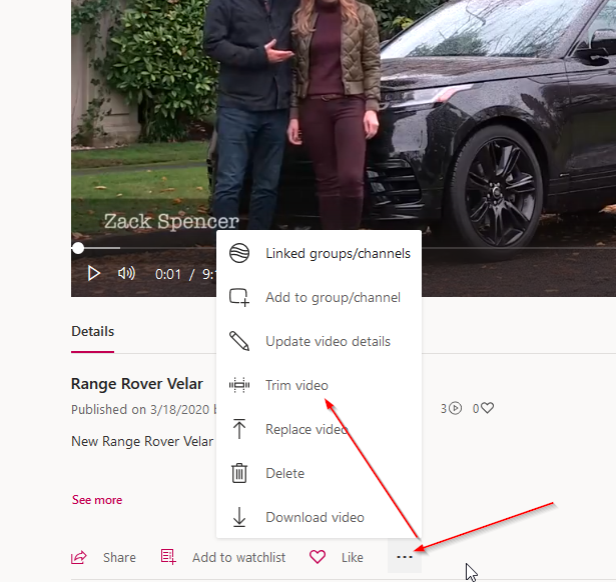
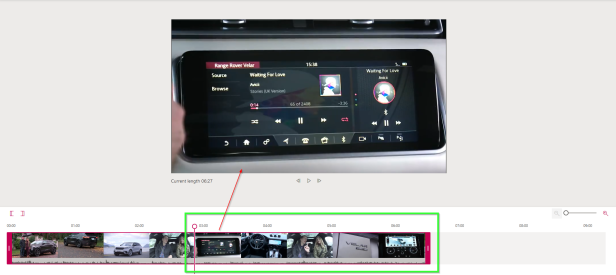
Open the video that you would like to trim and select (…) –> Trim Video
When we select Trim Video, stream will load a timeline of the content and we will be able to cut the video by dragging the trim handles. For longer videos, you may find it helpful to zoom in for greater precision in setting your trim point.
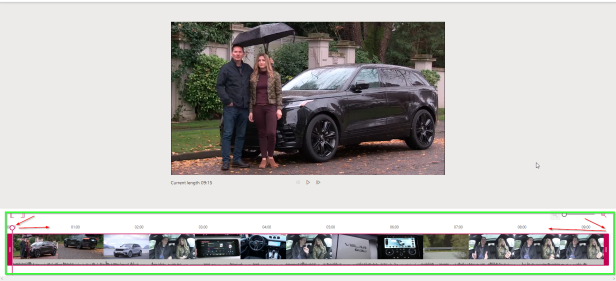
Once done, click Apply.
That’s it. Video is the new way of communication. Apparently many people prefer to view a video than read a short (or long) report. With that in mind, it’s time to consider the role that Microsoft Stream plays within Office 365.
In the third part we will explore Stream Administration and we will integrate it with Teams and Sharepoint Online.
Stay Tuned!
Cheers,
Nedim